How To: Use Laptop Checkout Kiosk
Please see below for step-by-step instructions on how to use the Laptop Checkout Kiosks.
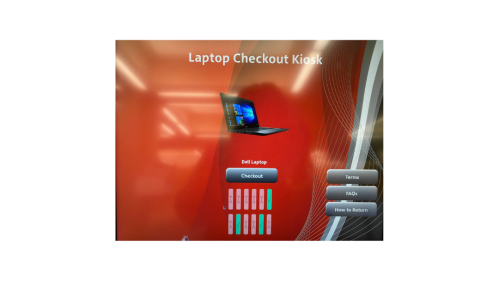
Step 1. Select Checkout
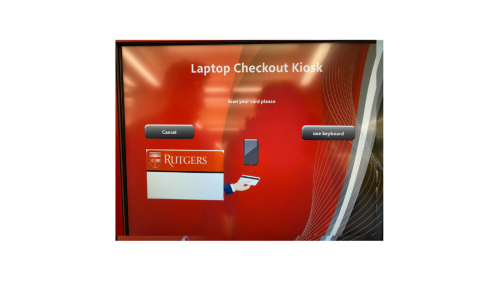
2. Swipe your ID
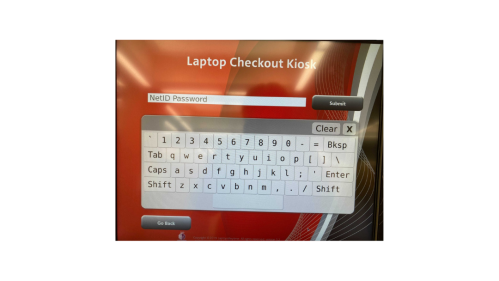
3. Enter your NetId password
4. Once authenticated, a laptop will be selected for you to take out, which is shown on the screen
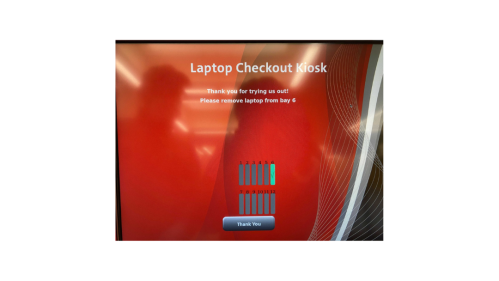
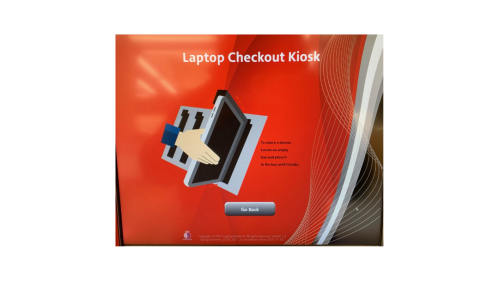
5. When it is time to check your laptop back in, find any empty slot and insert the laptop until you hear a click
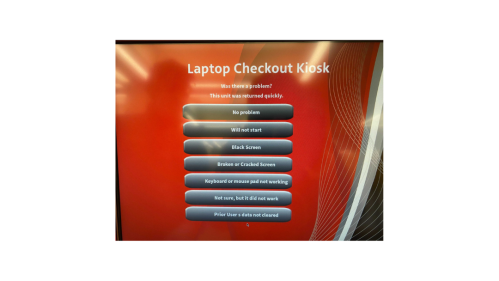
6. Select a reason as to why you are returning the laptop
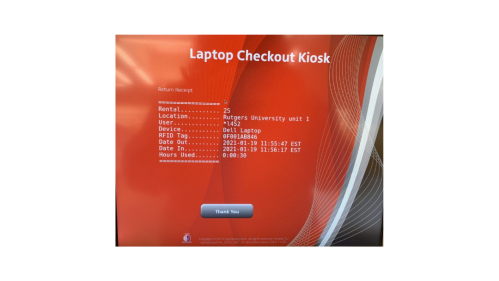
7. You will receive a receipt once the laptop is returned